Welcome to Propel! We are a ‘Community-as-a-Service’ platform focused on supercharging the growth of tech talent by providing them with access to global jobs, diverse opportunities, embedded finance, perks and discounted deals.
This is the first of our 2-part series carefully created to guide you through our platform seamlessly. It will cover, the process of signing-up/account creation, joining our talent pool, job application and perk redemption.
This guide specifically covers the signup/ account creation process. Please note that a demo account is used for this walkthrough.
Ready? Let’s dive in!
Step 1: Visit The Propel Community Page
Regarding sign up, your community lead will either provide you with a personalized Propel community link or direct you to the community page to sign up. The process is the same and here’s what how it works;
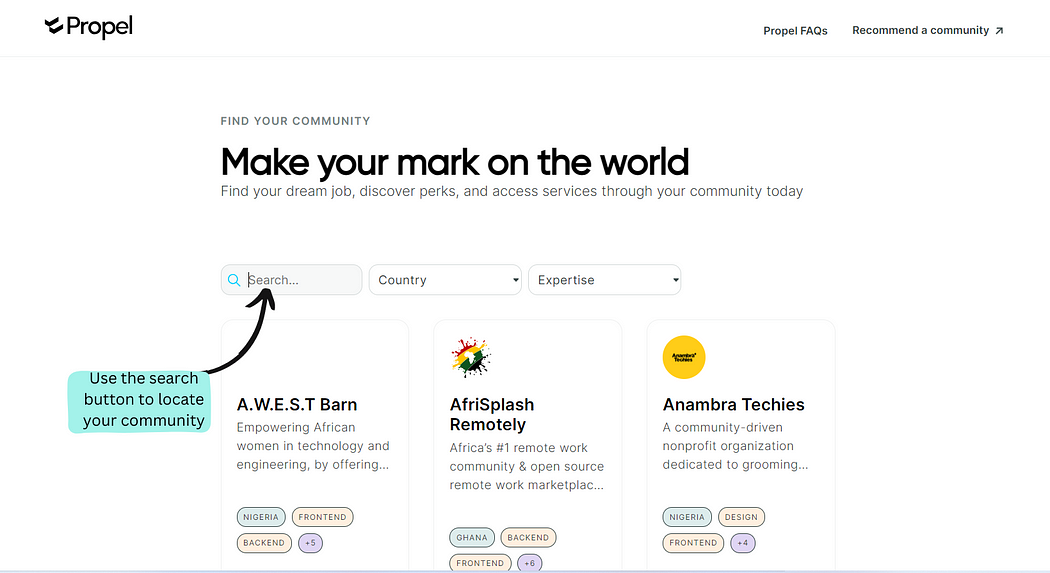
First visit the Propel community page and locate your community (eg Prop community). You can either browse through the list or use the “Search” button. You can also use the “Country” button to filter your search.

Step 2: Select Your Community
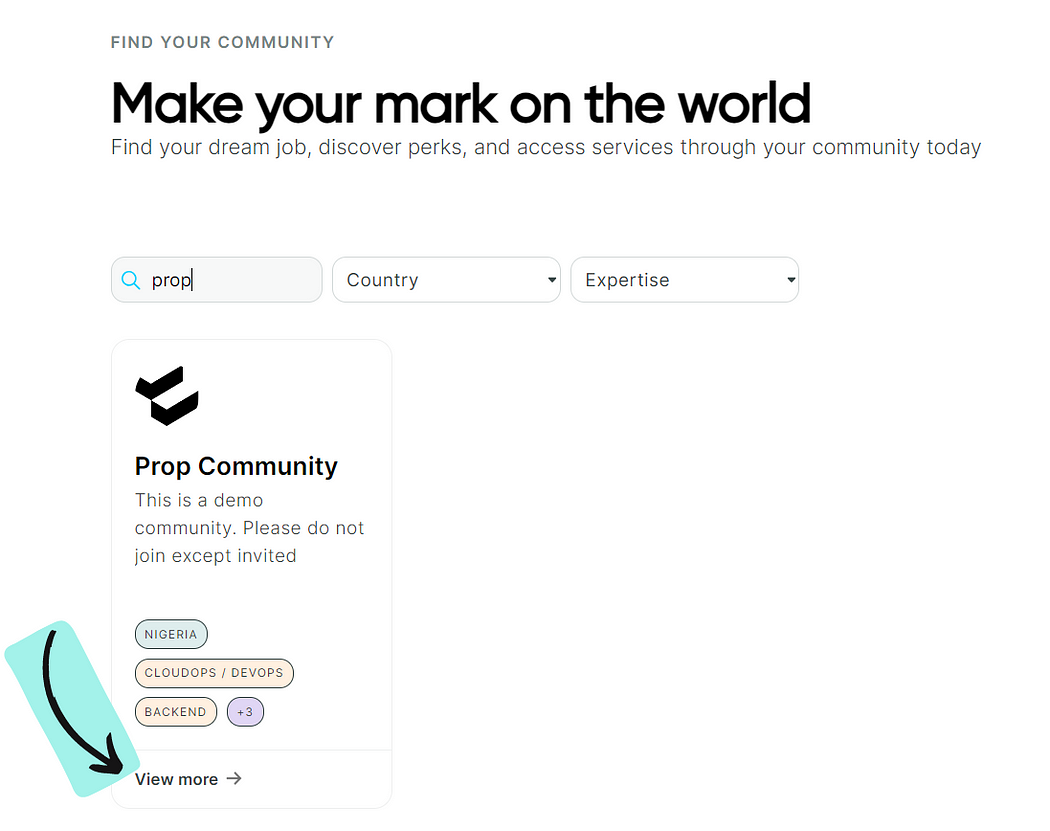
Then, click “View more” to be directed to your community dashboard on Propel.

Step 3: Access Your Community
You’ll be taken to your community page. This page includes your community summary, member skills & competencies, a list of jobs and perks available through your community on Propel. To optimize your profile, view more jobs, apply for them, and redeem perks, click on “Access community”.

Step 4: Input Your Email
Next, enter your email and click on “Get magic link”. You will get a pop-up message in a green text box, prompting you to check your email for a login link.

Step 5: Profile Creation
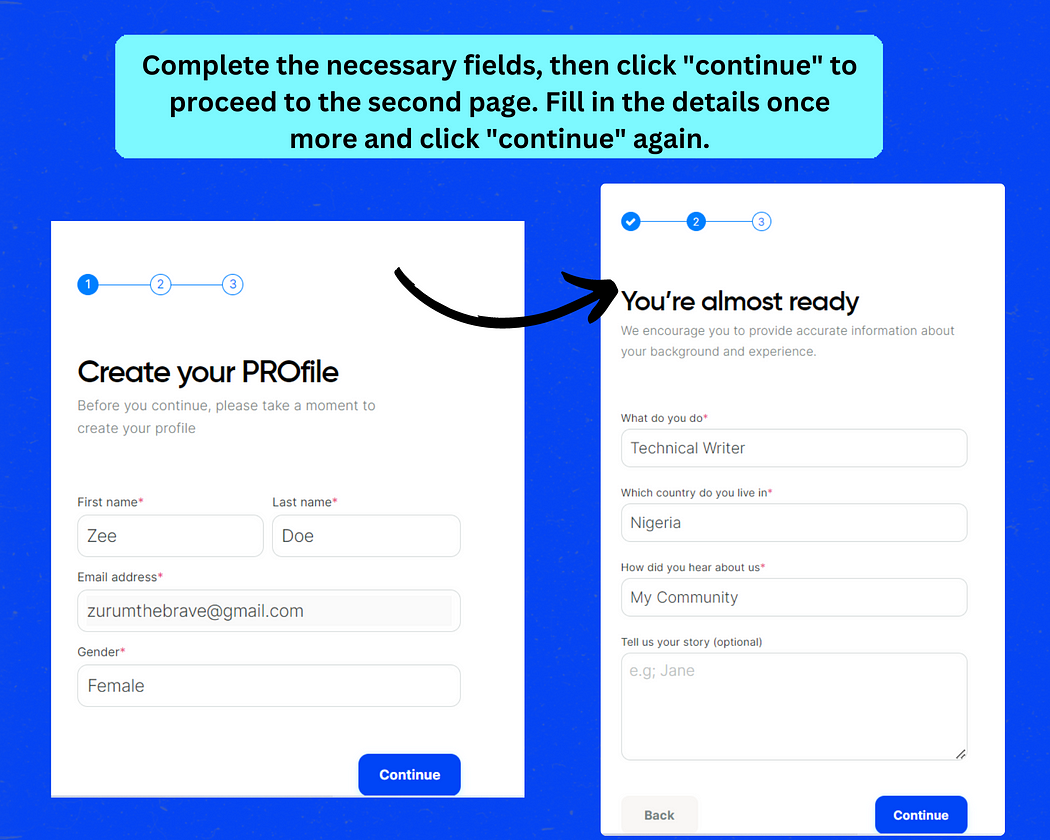
Look through your email and click on the link provided. You’ll be directed to create your profile. Fill in the required fields correctly and click “Continue”. Proceed to fill in other details required such as what you do, your country of residence, etc, and then click on “Continue”.

Step 6: Image Upload
You will be directed to upload an image of yourself. You can also decide to skip this particular process. Then Click on “Save and Continue”.

Step 7: Your Dashboard.
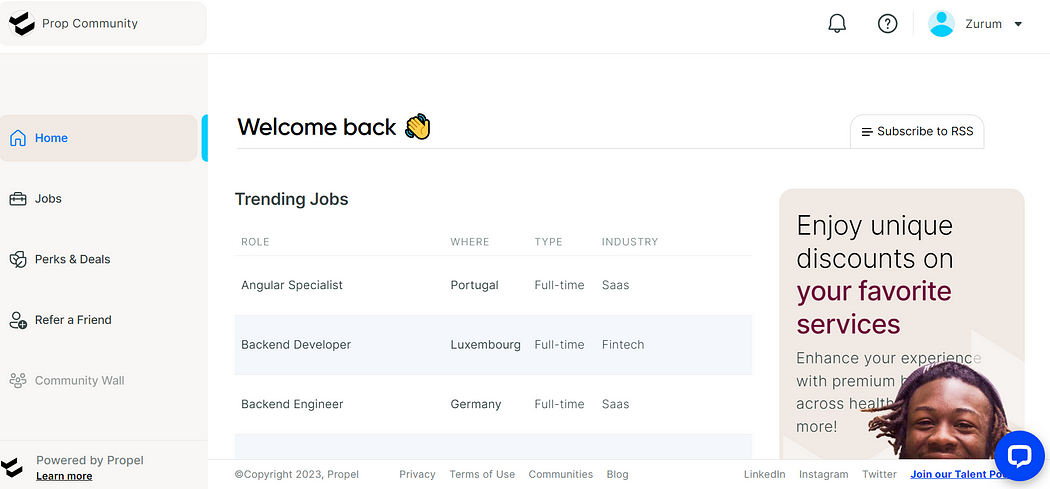
Once the last step has been completed, you will be redirected to your dashboard. A typical dashboard contains an avatar, your name beside it and a menu as shown in the picture below;

From your dashboard you can take certain actions like joining our talent pool, applying for jobs, claiming perks, and even referring a friend. In subsequent series, we will outline step-by-step instructions for each of these actions.
Now, it’s time to access your dashboard and create a stellar profile so you can stand out during job applications. Simply click on this link to find your community, create your profile, and make your mark on the world.
Got questions? Email us at support@propel.community and we’ll be more than happy to be of help.


.jpg)

.jpg)


